

Healthy Kit Kat Recipe |Gluten Free, Vegan| – Bake It Paleo
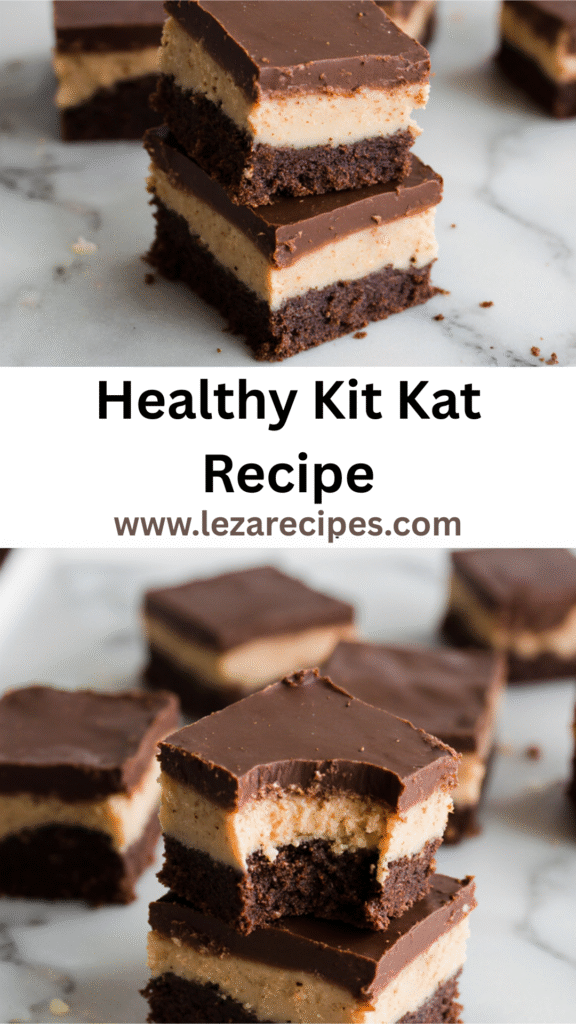
Do you miss the classic wafer bar but want a healthier version? You’re not alone. Many of us dream of enjoying our favorite treats in a better way. That’s why we’re excited to share this gluten-free, vegan Kit Kat recipe.
This dessert is not only gluten-free and dairy-free. It’s also great for those on a keto diet. With a few simple changes, you can enjoy a tasty chocolate treat that’s good for you.
The Appeal of Healthier Chocolate Treats
Today, more people are watching what they eat. This means they want healthier chocolate options. Now, you can enjoy your favorite chocolate treats without worrying about your diet.
Why Traditional Kit Kats Aren’t for Everyone
Traditional Kit Kats have gluten and dairy. This makes them bad for people with gluten intolerance or vegans. Healthier alternatives are needed for these diets.
Benefits of Homemade vs. Store-Bought
Making homemade Kit Kats lets you pick the ingredients. You can make them gluten-free and vegan-friendly. This way, you can also make healthier nut desserts and best snacks healthy with good ingredients.
Who This Recipe Is Perfect For
This recipe is great for anyone wanting chocolate snack ideas that are healthy and tasty. It’s perfect for vegans, those with gluten intolerance, or anyone wanting a healthier treat. Enjoy making your own healthier chocolate treats at home.
Health Benefits of This Gluten-Free, Vegan Recipe
Our gluten-free, vegan Kit Kat bars are a tasty way to enjoy chocolate without harming your health. We’ve picked ingredients carefully to make a treat that’s dairy-free and gluten-free. It’s also a healthier choice for eating.
Nutritional Advantages
The ingredients in our recipe have many health benefits. Using almond flour instead of wheat flour boosts the protein and is better for those with gluten issues. Plus, choosing vegan chocolate means the bars are animal product-free, making them perfect for vegans.
| Ingredient | Nutritional Benefit |
|---|---|
| Almond Flour | High in Protein, Gluten-Free |
| Vegan Chocolate | Dairy-Free, Rich in Antioxidants |
| Coconut Sugar | Lower Glycemic Index, Rich in Manganese |
Dietary Restrictions Addressed
This recipe meets many dietary needs. It’s sugar-free, which is good for those watching their sugar. The vegan chocolate and almond flour make it gluten-free and vegan-friendly.
Why It’s Better for Kids and Adults
Our healthier Kit Kat bars are perfect for kids and adults looking for a tasty, nutritious treat. They’re free from common allergens like gluten and dairy, making them safe for school or work snacks.
Choosing our gluten-free, vegan Kit Kat recipe means you’re getting a delicious chocolate snack that’s also healthy. It’s a healthy candy for kids that parents can trust.
Essential Ingredients for Your Homemade Kit Kat
Making a homemade Kit Kat starts with knowing its key ingredients. You’ll need to focus on two main parts: the chocolate and the wafer layers. Each part needs specific ingredients that fit dietary needs but keep the classic Kit Kat taste and feel.
Chocolate Layer Components
The chocolate layer is key for the Kit Kat’s flavor and feel. To make it dairy-free, pick the right chocolate.
Dairy-Free Chocolate Options
For a vegan Kit Kat, use dairy-free chocolate made from coconut, almond, or cashew milk. Enjoy Life Foods and DaVinci Gourmet have great options. Dark chocolate with high cocoa content is also a good choice. It’s naturally dairy-free and full of antioxidants.
Natural Sweeteners
To sweeten your chocolate, use natural sweeteners like maple syrup, coconut sugar, or dates. These options cut down on refined sugar and add special flavors. For example, a bit of coconut sugar can make the chocolate taste even better without being too sweet.
Wafer Layer Ingredients
The wafer layer needs gluten-free ingredients that stick together well.
Gluten-Free Flour Alternatives
For a gluten-free Kit Kat, use almond flour, coconut flour, or rice flour. Each flour is different, so you might need to adjust the mix and add xanthan gum or guar gum for texture. Almond flour, for instance, adds a nutty taste and is high in protein.
Binding Agents
To keep your wafer layers together, use egg replacers like flaxseed meal mixed with water or applesauce. These help the wafers stay together without eggs, making them vegan-friendly.
Choosing these ingredients carefully lets you make a homemade Kit Kat that’s tasty and fits many diets. It’s perfect for those looking for gluten-free, dairy-free keto desserts. Whether you’re inspired by homemade food videos or love trying healthy nut desserts, this recipe lets you get creative and customize.
Kitchen Tools and Equipment You’ll Need
Before you start making your healthy Kit Kat bars, you need the right tools and equipment. This makes the process smoother and ensures your final product is perfect.
Essential Tools
You’ll need a few essential tools to begin. These include a mixing bowl, a baking sheet, and a sharp knife or cookie cutter. You’ll also need a double boiler or a microwave-safe bowl for melting the vegan chocolate.
Optional but Helpful Equipment
While not necessary, a silicone candy mold can help you get the Kit Kat shape. A parchment-lined baking sheet is also useful for cooling your wafers.
Setting Up Your Workspace
To prepare your Kit Kat bars efficiently, set up your workspace. Lay out all your tools and ingredients. This makes the process smoother and reduces cleanup.
| Tool/Equipment | Purpose |
|---|---|
| Mixing Bowl | For mixing wafer batter |
| Baking Sheet | For baking wafers |
| Double Boiler/Microwave-Safe Bowl | For melting chocolate |
Preparing the Gluten-Free Wafer Layers
Gluten-free wafer layers are key to your healthy Kit Kat recipe. Making them is simpler than you might think. To get crispy and tasty wafer layers, follow a few important steps.
Mixing the Wafer Batter
To begin, mix the wafer batter. In a bowl, combine 1 cup of almond flour, 1/2 cup of coconut sugar, and 1/4 cup of coconut oil. Add 2 large eggs and 1 teaspoon of vanilla extract. Mix until smooth. Make sure all ingredients are at room temperature for the right consistency.
Baking Perfect Wafers
Preheat your oven to 350°F (175°C). Spread the batter thinly on a baking sheet lined with parchment paper. Bake for 10-12 minutes, or until the edges are golden. Watch them closely as baking time can vary.
Cooling and Preparing for Assembly
After baking, take the wafers out of the oven and let them cool completely on a wire rack. This step is key to prevent them from getting soggy. Once cool, break them into the sizes you need for assembly.
Troubleshooting Common Wafer Issues
If your wafers are too brittle or too soft, it might be due to oven temperature or batter distribution. Check your oven’s temperature with an oven thermometer for accuracy. For uneven wafers, use a silicone spatula to spread the batter evenly.
By following these steps and tips, you’ll make delicious gluten-free wafer layers for your homemade Kit Kat bars. These wafers are not just a treat for kids. They’re also a great gluten-free dairy-free keto dessert for adults looking for healthier candy options.
Creating the Perfect Vegan Chocolate Coating
Making a vegan chocolate coating is all about taste and looks. You need to pick the right chocolate, melt it right, and get the perfect texture.
Choosing Your Chocolate
It’s key to choose high-quality, dairy-free chocolate. Look for vegan labels and sustainable sources. DaVinci and Linda’s are great options.
Melting Techniques
To melt chocolate, use a double boiler or a microwave-safe bowl. Heat in short bursts, stirring each time. This prevents burning and ensures smoothness.
Adding Flavor Enhancements
Adding a pinch of salt or a teaspoon of vanilla can boost flavor. These touches can make your chocolate coating even better.
Achieving the Right Consistency
The chocolate’s consistency is key. Too thin, it won’t set; too thick, it won’t coat evenly. Adjust with coconut oil or cocoa butter.
By following these steps, you can make a vegan chocolate coating that’s tasty and gluten-free and sugar-free. Try different flavors to find your favorite. Enjoy your homemade Kit Kats as a healthier treat.
The Classic Kit Kat Assembly Process
Now that you have your wafer and chocolate layers ready, it’s time to make your healthy Kit Kat bars. Assembling these treats requires a few key steps. These steps will help you get that classic Kit Kat taste and look.
Layering the Wafers with Filling
Begin by layering your wafers with a filling. For a traditional Kit Kat taste, use a nut butter or dairy-free chocolate spread. Spread a thin layer on one wafer, then place another on top to make a sandwich.
Creating the Signature Shape
Next, use a sharp knife or cookie cutter to cut your wafer sandwiches into the iconic Kit Kat shape. If you have a Kit Kat mold, you can use that too.
Applying the Chocolate Coating
Melt your vegan chocolate as described earlier. Dip each Kit Kat bar into the chocolate, making sure they’re fully covered. Use a fork or dipping tool to coat them evenly and remove any extra chocolate.
Setting and Cooling Methods
Put your chocolate-coated Kit Kat bars on a parchment-lined baking sheet. Refrigerate them for at least 30 minutes to set the chocolate. For a firmer coating, freeze them for 10-15 minutes.
Visual Guide to Perfect Kit Kat Bars
Here’s a simple guide to help you visualize the assembly process:
| Step | Description | Tips |
|---|---|---|
| 1 | Layer wafers with filling | Use a thin, even layer |
| 2 | Create the Kit Kat shape | Use a sharp knife or mold |
| 3 | Apply chocolate coating | Ensure full coverage |
| 4 | Set and cool | Refrigerate or freeze |
By following these steps, you’ll make delicious, homemade Kit Kat bars that are gluten-free and vegan. Enjoy your healthy nut desserts and think about sharing your creations in homemade food videos to inspire others.
Creative Flavor Variations and Customizations
Get creative and make your healthy Kit Kat bars unique. You can add new flavors and decorations. This way, you can make them fit different tastes and diets.
Seasonal Flavor Ideas
Use seasonal flavors to make your Kit Kat bars exciting. Try peppermint for Christmas or pumpkin spice in fall. Seasonal flavors make your treats timely and appealing.
Adding Superfoods for Extra Nutrition
Make your Kit Kat bars healthier with superfoods. Add chia seeds, goji berries, or matcha powder. These superfoods boost nutrition and add interesting tastes and textures.
| Superfood | Nutritional Benefit | Flavor/Taste |
|---|---|---|
| Chia Seeds | High in Omega-3 fatty acids | Mild, nutty flavor |
| Goji Berries | Rich in Antioxidants | Slightly sweet, tangy |
| Matcha Powder | High in Antioxidants, Caffeine | Grassy, slightly bitter |
Nut Butter Enhancements
Nut butters like peanut butter or almond butter add creaminess. Try different ones to find your favorite.
Color and Decoration Options
Use natural colors and decorations to make your Kit Kat bars look great. Try coconut flakes or edible flowers. Creative decorations make your treats perfect for gifts or special events.
With these ideas, you can enjoy many healthy chocolate and snack options. They’ll match your taste and dietary needs.
Storage and Serving Suggestions
Now that you have your gluten-free, vegan Kit Kat bars, let’s talk about keeping them fresh. The right storage helps keep their texture and taste perfect.
Room Temperature Storage
For a short time, you can store them at room temperature. Use an airtight container to keep them dry. This is best if you’ll eat them in a few days.
Refrigeration and Freezing Guidelines
For longer storage, refrigerate or freeze them. Wrap each bar in parchment paper and store in a sealed container. They’ll last up to two weeks in the fridge or months in the freezer. Just thaw at room temperature or in the fridge when you’re ready.
Perfect Pairings and Serving Ideas
These bars are great on their own or with other treats. Enjoy them with almond milk or coffee. They’re also tasty on ice cream or yogurt.
Gift-Giving Presentation Tips
These bars are perfect for gifts. Wrap them in pretty paper or put them in a box. Add a personal note or a label to highlight their special ingredients.
Follow these tips to enjoy your homemade Kit Kat bars for weeks. Whether it’s for yourself or to share with others, they’re always a hit.
Conclusion: Enjoying Your Homemade Healthy Kit Kat Bars
Now that you’ve made your own healthy Kit Kat bars, it’s time to enjoy them. This gluten-free, vegan version is a treat for you and a great choice for kids. You can share them with family and friends or enjoy them guilt-free.
Think about sharing your homemade food videos on social media. Show off your creative twist on the classic Kit Kat recipe. This way, you can inspire others to eat healthier without giving up their favorite treats. Enjoy your homemade Kit Kat bars and happy baking!
FAQ
What makes this Kit Kat recipe healthy?
This Kit Kat recipe is healthy because it’s gluten-free and vegan. It uses dairy-free chocolate and natural sweeteners. This makes it good for those with dietary restrictions.
Can I customize the flavor of my Kit Kat bars?
Yes, you can change the flavor of your Kit Kat bars. Try different dairy-free chocolates, add nut butters, or superfoods for extra nutrition.
How do I store my homemade Kit Kat bars?
Store your homemade Kit Kat bars at room temperature, in the fridge, or freezer. Keep them in an airtight container to stay fresh.
Are these Kit Kat bars suitable for kids?
Yes, these Kit Kat bars are a healthier choice for kids. They’re great for kids with dietary restrictions or preferences.
Can I make these Kit Kat bars without a specific ingredient?
Yes, you can swap out ingredients based on your diet. Use different gluten-free flours or natural sweeteners instead.
How do I achieve the signature Kit Kat shape?
To get the Kit Kat shape, layer wafers with filling carefully. Then cut them into shape before coating with chocolate.
What are some creative ways to decorate my Kit Kat bars?
Decorate your Kit Kat bars with nuts, sprinkles, or shredded coconut. Use colored chocolate or candy melts for fun designs.
Can I make these Kit Kat bars as gifts?
Yes, these Kit Kat bars are perfect for gifts. Package them nicely in individual wraps or a decorative tin or bag.
Did you like this recipe ?
There are no reviews yet. Be the first one to write one.